When winter's icy grip tightens around our homes, we can't afford to let our backup power sources fall victim to neglect. We've seen countless generators fail at the worst possible moments simply because their owners didn't take the time to properly prepare them for extended storage. Whether you're packing away your portable unit or safeguarding your standby system, the process of winterizing your generator requires careful attention to detail and a systematic approach. Let's explore the essential steps that'll guarantee your power backup springs to life when you need it most.
Fuel System Preparation Steps
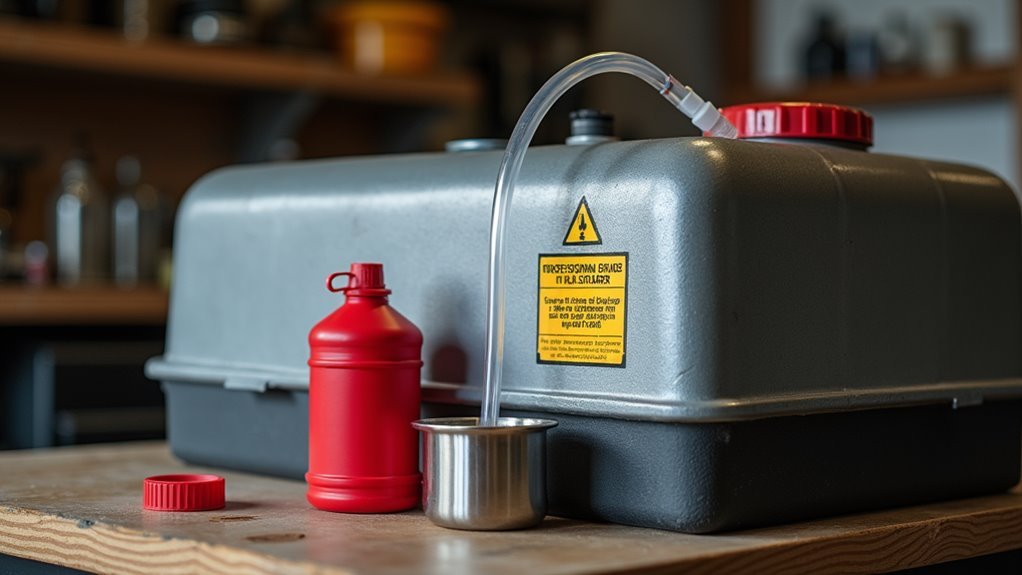
Your generator's fuel system needs proper winterization to prevent damage and guarantee reliable cold-weather starts. We'll walk you through the essential steps to protect your equipment and maintain your independence during storage.
First, we'll add a high-quality fuel stabilizer to prevent fuel breakdown and protect metal components.
Let's run the generator for about 10 minutes to circulate the treated fuel throughout the system.
Next, we're going to drain the carburetor bowl completely – this prevents gummy deposits from forming and blocking fuel flow.
Don't skip this step, as it's vital for avoiding startup problems later.
For long-term storage, we recommend filling the fuel tank to about 95% capacity.
This leaves just enough room for fuel expansion while preventing condensation from forming inside the tank.
If you're storing for more than six months, you might want to drain all fuel completely.
Remember to check fuel lines for any cracks or wear – now's the perfect time to replace damaged components. Additionally, it's important to understand that following proper fueling practices can significantly enhance your generator's longevity.
Clean and Inspect Components
With the fuel system properly prepared, our next step focuses on cleaning and inspecting key generator components.
We'll want to thoroughly examine every part to guarantee our generator stays in top condition during its winter rest.
Let's start by removing and cleaning the air filter – just tap it gently to remove loose debris, or replace it if it's particularly dirty.
Next, we'll wipe down the entire generator housing with a clean cloth, paying special attention to the cooling fins and vents where dirt tends to collect.
Don't forget to check all electrical connections for any signs of corrosion or loose wires.
We should also inspect the spark plug for wear and tear.
If it's been more than a season, now's the perfect time to replace it.
Take a close look at all rubber components, including fuel lines and seals – they're prone to cracking in cold weather.
While we're at it, let's check the oil drain plug and other fasteners to make sure they're properly tightened. Additionally, it's essential to check for any loose connections to ensure safe operation when the generator is in use.
Battery Care and Maintenance
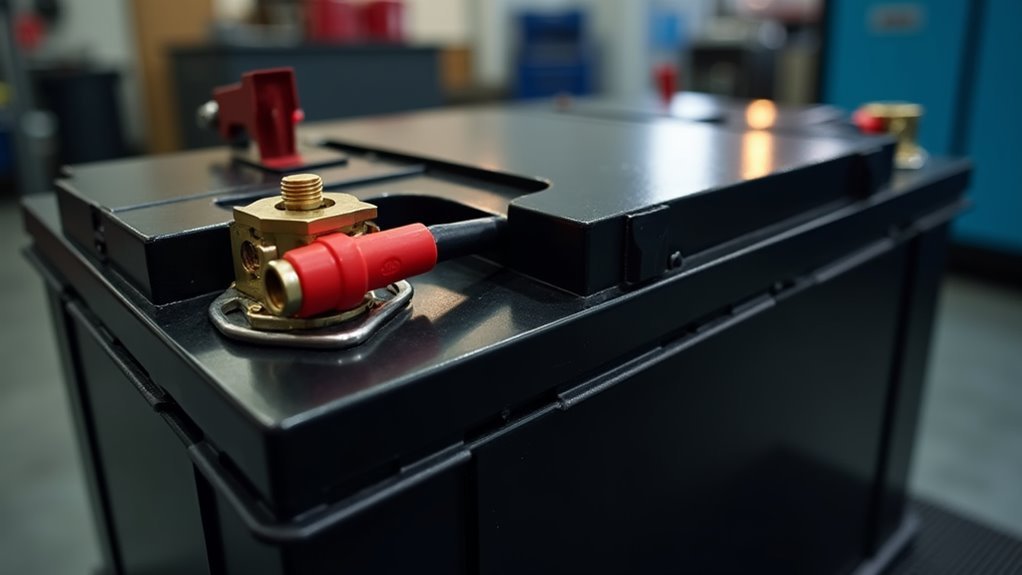
Proper battery maintenance stands as a crucial step in winterizing your generator.
We want to make certain your generator starts reliably when spring arrives, so let's focus on keeping that battery in top condition during the cold months. A well-maintained battery will serve you faithfully when you need backup power most.
Here's what we'll do to protect your generator's battery during winter storage:
- Clean the battery terminals thoroughly with a wire brush and baking soda solution to remove any corrosion, then dry completely.
- Check the electrolyte levels in each cell if you have a conventional battery, topping off with distilled water if needed.
- Apply a thin coating of petroleum jelly or battery terminal protector to prevent future corrosion.
- Either remove the battery and store it in a cool, dry place around 40°F, or connect it to a trickle charger if leaving it installed.
Storage Location Requirements
Selecting an ideal storage location for your generator during winter months can make the difference between reliable operation and costly repairs come spring.
We'll want to find a spot that's clean, dry, and protected from the harsh winter elements. Your best choice is a covered area like a garage, shed, or carport that's well-ventilated but sheltered from rain, snow, and ice.
We recommend keeping your generator at least 5 feet away from any flammable materials and ensuring there's enough space around it for proper air circulation. The floor should be level and solid – concrete is ideal, but a sturdy wooden platform works too.
Don't forget about temperature control! While generators are tough machines, extreme cold can damage sensitive components.
Try to keep the storage area above freezing, but you don't need to keep it toasty warm. If you're using an unheated space, consider placing a moisture-absorbing desiccant nearby to prevent condensation from forming.
Remember to cover your generator with a breathable cover that's specifically designed for outdoor power equipment – this'll protect it from dust while allowing any trapped moisture to escape.
Starting After Winter Storage

Now that you've safely stored your generator through winter, getting it running again requires careful attention to several key steps.
We'll walk you through the process of bringing your generator back to life, making certain you're prepared for whatever nature throws your way.
Let's make sure your power backup system is ready to keep your independence intact.
Before starting your generator, we need to complete these essential checks:
- Check all fluid levels including oil, fuel, and coolant – top off with fresh supplies and make sure there's no contamination or separation.
- Inspect all components for signs of rust, corrosion, or pest damage that might've occurred during storage, paying special attention to electrical connections.
- Remove any protective covers and reconnect the battery, making sure terminals are clean and securely fastened.
- Test the pull cord or electric starter to make sure smooth operation before attempting a full start.
Once you've completed these checks, let the generator run for at least 15 minutes to make sure everything's working properly.
Listen for any unusual sounds and monitor the output to confirm it's generating power correctly.
Frequently Asked Questions
How Often Should I Test My Generator During Winter Storage?
We recommend starting your generator every 30 days during winter storage. Let it run for 10-15 minutes with a load attached to keep fuel flowing and internal parts lubricated.
Can I Use a Generator Cover During Winter Storage?
We definitely recommend using a generator cover during winter storage, but make sure it's breathable to prevent moisture buildup. Don't use plastic tarps – they'll trap condensation and cause rust.
What Temperature Range Can Damage My Stored Generator?
We've found that generators can suffer damage when stored in temperatures below 32°F or above 110°F. Let's protect your investment by keeping it in a climate-controlled space during long-term storage.
Should I Disconnect Spark Plugs Before Long-Term Generator Storage?
We'll want to remove and clean those spark plugs before storage – it's essential for preventing cylinder rust and ensuring easy starts later. You're better off taking this extra precaution.
How Long Can a Generator Remain in Storage Without Maintenance?
We don't want your generator collecting dust while time ticks away. Even with perfect prep, we recommend checking it every 3-4 months, though it can technically survive 6 months untouched.
Conclusion
Just like we protect our cars from harsh winter weather, we've learned how essential it is to winterize our generators properly. It's like putting our trusty backup power friend into hibernation – with proper fuel, clean parts, and a cozy storage spot. When we follow these steps carefully, we'll avoid that sinking feeling of a generator that won't start when spring storms roll in. Let's keep our power protection ready, rain or shine.